The BudTrainer Method™ Lesson #2
When & How To Transplant Cannabis
Transplant cannabis when the rootball is knit and holds its shape. Pre-fill the next pot, make a same-size hole, ease the rootball in, don’t compress soil, and water once to light runoff. Keep light modest for 24–48h and let the pot dry back before the next watering.
Updated on Oct 1, 2024
DISCLAIMER
Everything taught and sold by BudTrainer® is to be used strictly for legal purposes. We condemn the production of illegal substances and it is your duty to ensure that you are complying with the law. The words "hemp", "cannabis", "weed", and "marijuana" are used interchangeably to refer to the same plant (legal hemp with less than 0.3% THC) for the purposes of this lesson.
What You'll Learn
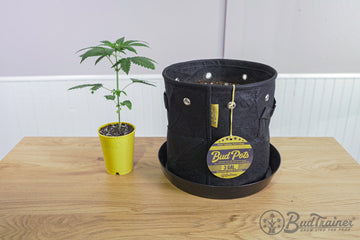
Mastering the art of transplanting is crucial in order for your plant to thrive. If not done properly you might face what is called transplant-shock, which is the stunting of your plants for up to 3 days due to disturbances to the root system. We know this all too well because we’ve made this mistake in the past, until we took to plant science and commercial cannabis production standards to create a method (and a product) to ensure your transplants are as smooth as possible.
Tools & Materials
- BudPots or other pot
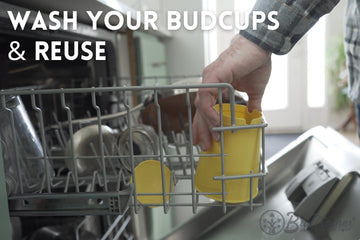
- BudCups or other cup
- Veg stage nutrients
- Soil or other media
- Tap water or RO water
- Mycorrhizal fungi

NOTE: this method works for autoflowers and photoperiodic cannabis plants (learn the difference).
When To Transplant Weed Seedlings
If you followed The BudTrainer Method Lesson #1: How to Plant & Germinate Cannabis Seeds, the ideal time to transplant your seedlings is described below.
A: 3-4 Weeks From Planting Or Cloning
Most cannabis plants are ready for their first transplant away from their nursery pots after 3 to 4 weeks from planting. However, not all plants grow vigorously and are ready in such a short amount of time, which is why it's important to check your roots before making a final decision.
A: Before Roots Start Circling
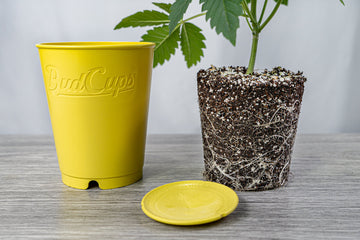
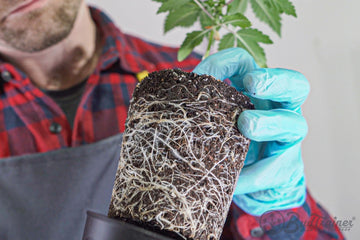
The tell-tale sign that your plant is ready for transplanting is not just time but whether your root ball has roots shooting out in all directions at the top, like in the picture below. This typically happens between weeks 3 and 6 from planting.
To peek at your roots, simply pop the bottom of your BudCups and have a look. If you are using nursery pots or plastic cups, flip them upside down in order to remove the rootball. Do not pull by the stem or you will risk braking the roots.
A: When Media Dries in 24h
Another sign that your seedling is ready for transplant is when the media goes dry 24h after a full watering. This means your roots are consuming all the water available to them in a short period of time, so you are better off transplanting.
How To Transplant Marijuana Plants
Step 1
Fill Your BudPots (or other pot)
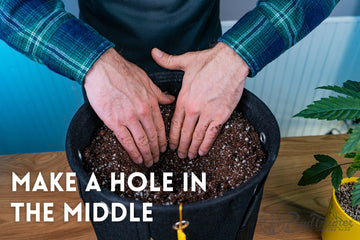
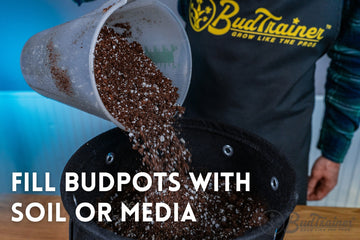
In order to transplant your cannabis plant, you will first need to fill up your BudPots or pot of choice with the media. This part is super easy - go ahead and dump the soil/media inside your container or the BudPots until just below the grommet level.
The BudPots are the only fabric pot in the world that holds its shape with the structural metal ring around the top, so you don’t have to worry about dumping your dirt everywhere.
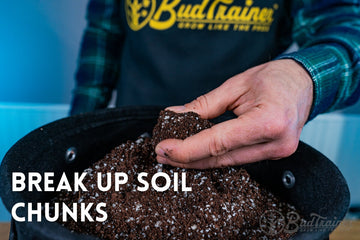
Make sure to also break up any chunks of soil, as they don't allow roots to properly penetrate due to how compacted they get. Simply crumble it with your hands when you see one.
Step 3
Pop Your Rootball Out
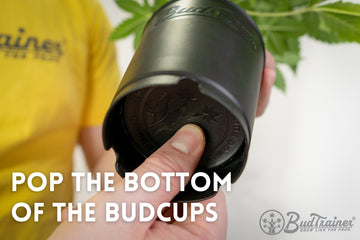
Now that you have a perfect hole for the BudCups (or other plastic container), it is time to remove your young plants from them and transplant your root ball into the BudPots. For this, simply pop the bottom of the BudCups with your finger until the entire root ball comes out. As you push the bottom of the BudCups, pull on the young plant's stem to see if it is strong enough to hold the entire root ball. If it is not, pick your plant up from the sides of the root ball instead, but very gently.
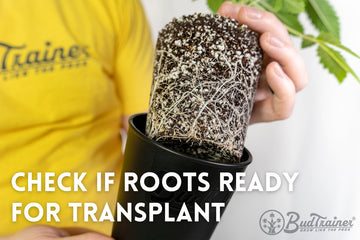
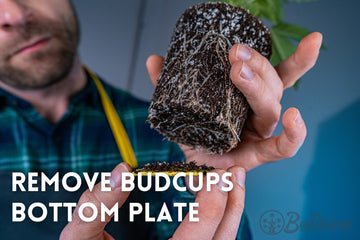
If the bottom plate of the BudCups is still stuck to the bottom of the roots, make sure to remove it before transplanting.

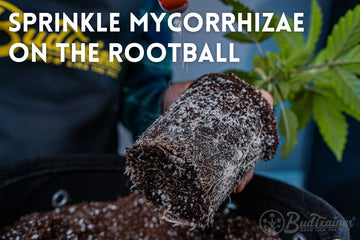
BudTip: Use Mycorrhizal Fungi To Grow Bigger Roots
Mycorrhizal fungi is a commonly used supplement for cannabis plants as it helps your roots intake more nutrients, thus allowing you to grow bigger plants. This fungus called Mycorrhizae creates a mutualistic relationship with your roots, where it absorbs more nutrients from the soil in exchange for some sugars from your plant. Working together, they create massive root structures that take your plants to the next level.
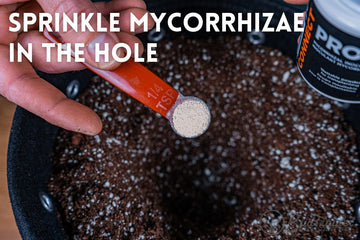
To use Mycorrhizal, just sprinkle one teaspoon at the bottom of the plant hole, transplant the rootball from your BudCups, sprinkle another teaspoon on top of it, and shake the BudPots in order to let the dirt fill in the gaps and cover the mycorrhizae. If you are looking for a high-quality Mycorrhizal Fungi, we recommend PRO-MIX CONNECT, which is what we use on all of our plants at BudTrainer® - it’s super easy to use and works like a charm.
Step 4
Transplant Your Plants
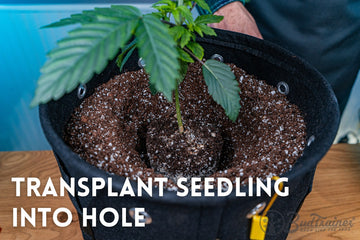
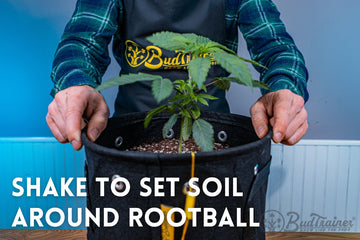
After your rootball is out, drop it right inside the hole, and shake your BudPots to allow the soil to fall around the rootball. Make sure that the top soil on your BudPots is nice and flat, but do not press down on the soil as this will make it more difficult for your roots to grow. Just a little shake is all you need!
How To Choose Your Final Pot Size
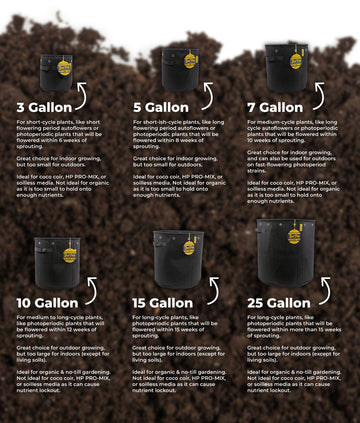
Pots, like the BudPots, come in various sizes ranging from 3Ga to 25Ga and higher. The question is, which one is the right size for you? There are a few things to consider, and they are broken down below:
How to Water Cannabis After Transplanting
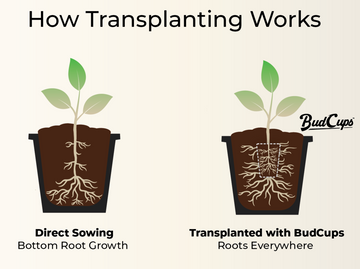
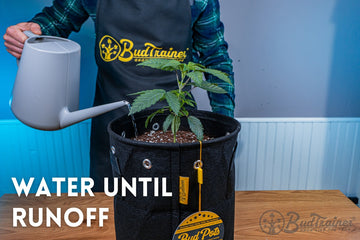
Using dechlorinated tap water, or RO/distilled water with vegetative stage fertilizer, moisten your soil slowly (ideally, over 60 to 120 seconds) until you see the first few drops of runoff start coming out of the bottom, then stop. This means your media can no longer hold water, which will promote your roots to grow out in every direction in search of that much needed water.
Be Careful With Overwatering
Since you will be watering until runoff, it is important NOT to water your plant again until your BudPots feel nearly empty (almost dry). This will take a few days, directing your roots to grow out in search of the remaining water.
On the other hand, if you overwater your media by constantly adding water to your plant, your roots will grow small and you will risk getting root rot. For this reason, every time you water your plants, make sure to water until runoff, and then wait a full dry back to water again.
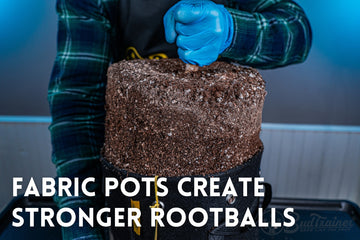
You will end up with a healthy root ball like the one below, which lived in the BudPots for 16 weeks. Since the walls of the BudPots are made of fabric, the root tips were naturally pruned, causing the root structure to grow stronger from the center.
How to Transplant Autoflowers
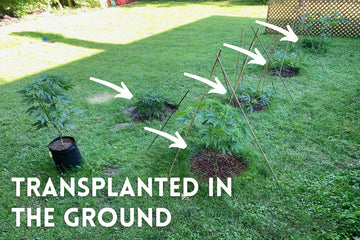
It is a common misbelief that transplanting autoflowers is bad for their development due to transplant shock. It is said that this stunts their growth and prevents them from developing fully, and as such you should plant autoflowers in their final containers.
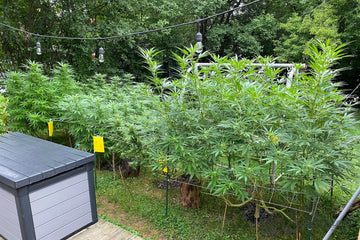
However, we have been able to prove quite the opposite of this by using the BudCups - just look at the autoflower below, which yielded half a pound of dried bud, and was transplanted exactly as we teach in this lesson.
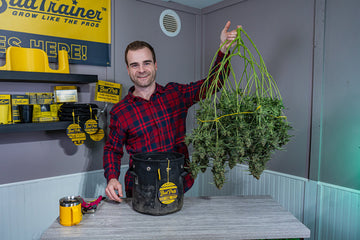
What is important with autoflowers is to transplant them the day the roots start “shooting out” of your rootball, which means you need to keep an eye on them every day after week 3 from planting. In fact, it is very easy to check on your roots when you have an easy-transplanting container like the BudCups - all you have to do is pop the bottom and check your roots.
Learn to Grow Big Buds
And be the first to hear about new articles, product releases, and special events.
About The Author
Henrique, the CEO of BudTrainer®, is a mechanical engineer with a commercial cannabis production post-grad, and is also a former commercial cannabis consultant.
H takes plant science principles and breaks them down into simple steps for home growers to achieve the same results as the pros and grow the highest-quality cannabis.

