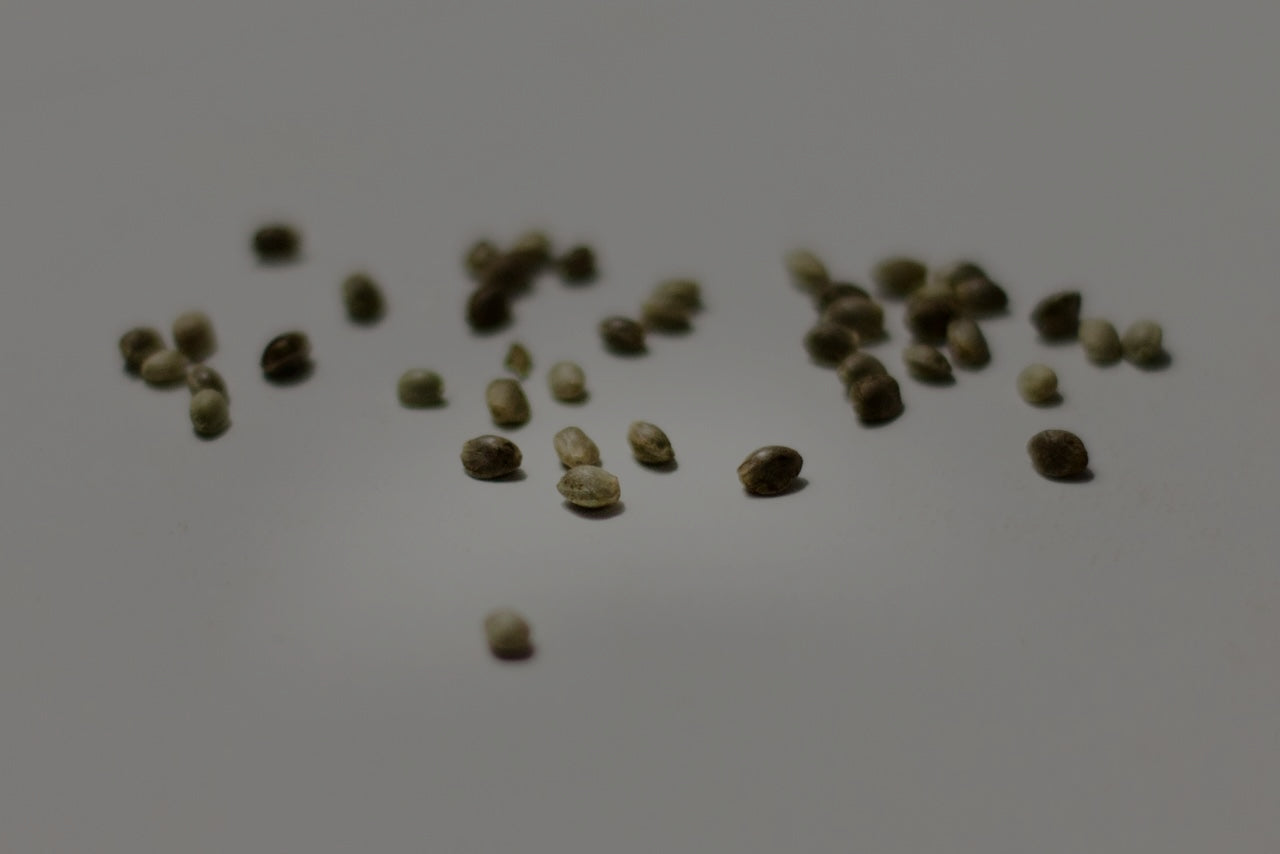
The BudTrainer Method™ Lesson #1
How to Plant & Germinate Cannabis
To plant cannabis seeds: pre-moisten media, make a ¼″ hole, place the seed point-down, cover lightly, and dome. Target pH ~6.2–6.6 (soil) or 5.8–6.2 (coco), EC ≤0.8; light ~100–200 PPFD at 18/6; root-zone 24–26 °C; RH 70–80%.
Updated on Nov 11, 2025
DISCLAIMER
Everything taught and sold by BudTrainer® is to be used strictly for legal purposes. We condemn the production of illegal substances and it is your duty to ensure that you are complying with the law. The words "hemp", "cannabis", "weed", and "marijuana" are used interchangeably to refer to the same plant (legal hemp with less than 0.3% THC) for the purposes of this lesson.
What You'll Learn
- How to plant cannabis in your starting container
- The right light, temperature, pH, and EC for weed seedlings
- How to avoid dead and/or lanky marijuana seedlings
- How to tell if a cannabis seed is a dud or alive
- When to transplant weed into the next pot
- Why transplanting is better than planting in the final pot
- Why the paper towel method is not be the best option to start seeds
Tools & Materials
- Soil or other media
- BudCups, nursery pot, or plastic cup
- Feminized seeds
- See-thru cup or dome
- Tap water or RO water
- Mycorrhizal fungi
- Veg stage nutrients
- CFL light & mat heater

NOTE: this method works for autoflowers and photoperiodic cannabis plants.
How To Plant Seeds In 5 Steps
Step 1
Step 1
Prepare Your BudCups Or Starting Container
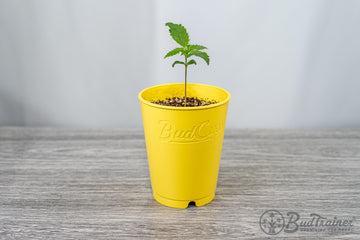
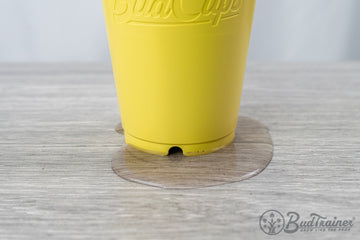
Drop the bottom plate inside your BudCups and make sure it sits flat at the bottom, with the convex, shiny end facing up (this is very important for the tripe-drainage mechanism to work).
If you don’t have the BudCups, choose a plastic cup or nursery pot with around 16oz of volume, and make sure that the bottom is perforated to allow water out and prevent root rot.


Step 2
Fill With Soil Or Other Media
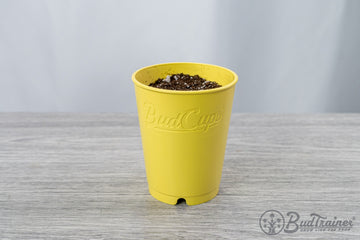
Fill your BudCups with soil, coco coir, or other media of preference, up to the top rim.
Make sure to break down any dense chunks of soil and do NOT pack your soil down, as your roots need oxygen in order to grow, not just water. Loose soil creates oxygen pockets for your roots to grow into, and if those pockets are closed, or completely waterlogged, they have nowhere to grow.


BudTip: Use Mycorrhizal Fungi To Grow Bigger Roots
Mycorrhizal fungi is a commonly used supplement for cannabis plants as it helps your roots intake more nutrients, thus allowing you to grow bigger plants. This fungus called Mycorrhizae creates a mutualistic relationship with your roots, where it absorbs more nutrients from the soil in exchange for some sugars from your plant. Working together, they create massive root structures that take your plants to the next level.

To add mycorrhizal fungi to your media, just blend it into the top of your soil, mainly around the center area where the seed will be planted. This will create the perfect "bed" for your seed. We recommend PRO-MIX CONNECT, which is what we use on all of our plants at BudTrainer - it’s super easy to use and works like a charm.
Step 3
Water Your Media Before Planting
The best time to water your media is before planting to avoid disturbance to the seed. Using 150ml (5oz) of dechlorinated tap water or distilled/RO water mixed with your vegetative stage nutrients, moisten the soil slowly, over 60 seconds, as if you were making a pour-over coffee. Stop watering when you see drips coming out of the bottom. This ensures your seedlings have enough water for the first 10 to 14 days.
To learn the ideal EC and pH for your seedlings, scroll down below.

Step 4
Plant Your Seeds
(Optional) Pre-soak your seeds in a mixture of 1 part hydrogen peroxide 3% and 2 parts water for 12h to 18h before planting. This helps kill any bacteria on the outside while also softening the seed cap.
Why not use the paper-towel method? Learn why we discourage the paper towel method down below.
- Make a small ¼" (6mm) deep hole in the center of your BudCups.
- Place your seed into the hole, with the pointy end facing down and the crown facing up.
- Cover with a small amount of media. This will allow your seed to germinate in 2 to 4 days.
If you don’t have seeds yet, we wrote an entire lesson on "How to Select Your Cannabis Seeds", which will help you decide what are the best strains for your growing conditions, as well as your growing taste.


Step 5
Cover Your Seedlings
Young seedlings need high-humidity to thrive. Use a simple transparent plastic cup and cut 2 holes at the bottom and 2 holes at the top, then flip it upside down, on top of the seed.
You can remove the transparent cup once the seedling reaches the top, or once the leaves start touching the sides, so that the seedling can be exposed to airflow.
Alternatively, you can use a seedling dome, as you will see in the "How To Prepare The Environment" section.

Wait 2 To 5 Days For Germination
Now that you have planted your seeds and created the perfect environment for them to thrive in, it's time to wait for them to sprout, which typically happens between 2 and 5 days from planting. However, sometimes seeds take longer than that to come out, and sometimes they are simply dead. To learn if you seed is a dud, see the FAQ section below.
Temperature, Humidity, Light, Airflow For Weed Seedlings
Add Light
At this stage, it is essential to provide 18-20 hours of light per day. You can do this by using a 30W indoor grow light (preferably a CFL light), an LED light at the lowest setting, or you can grow your seedling on a sunny windowsill.
If you have a PAR meter (you can also use a simple lux phone app), you are aiming for around a 100 PPFD (~8,000 lux) for the first 2 weeks, which can be increased to 150-200 PPFD (~12,000 to ~16,000 lux) during weeks 3 to 4.
Add Warmth
Marijuana seeds love some extra warmth to germinate, so try to keep the temperature under your nursery pots between 75-79°F (24-26°C) by using a seedling heat mat (easily found on Amazon). If you don't have one, just keep your seedlings on top of somewhere warm, not cold.
Watch out if temperatures go above 80°F or 27°C. If this happens, dial down or turn off your heat mat, as your light might be causing heat by itself.
Add Humidity
In order to give your seedling the best start, you need to provide them with a high humidity environment. However, too much humidity will also cause them to dampen off (rot from the inside and die). So, what's the ideal levele of relative humidity (RH)?
- RH 80% during weeks 1 to 2
- RH 70% during weeks 3 to 4
You can accomplish this by either using a transparent cup, as suggested in Step 5, or you can use a humidity dome like in the picture above. If you are using the dome option, make sure you are opening the small windows in order to let some humidity out, or it can go above 80%.
Add Airflow
After a 5 to 7 days, remove your seedling from the humidity dome or from under the transparent plastic cup so that they can be exposed to light, natural airflow. Ensure the humidity in the environment is still at 70% to 80% after exposing the seedling.
Alternatively, you can add a small fan pointed at the window of the humidity dome or at the holes of your transparent cup in order to accomplish this. This way you don't have to compromise your humidity.

pH & EC (ppm) For Marijuana Seedlings
For you to accomplish the following, you will need a pH and EC (or ppm) meter.
Types of Water
DO NOT use softened water, as it has salts that your plants can't use, but that they absorb anyways. This will cause nutrient lockouts and harm your plant later on.
DO use Distilled or RO water, as they can take the most amount of fertilizer.
You CAN use Tap water, but make sure you leave it out for 24h in order to dechlorinate it.
Step 1: Adjust Seedling EC (or ppm)
Seedlings are sensitive to fertilizers since they already have nutrients in their own seed shells to survive the first week. However, a mild mix of nutrients to a maximum EC of 0.8 (or 400 ppm) can really help them once they are ready to start increasing the nutrient uptake.
If your water already has an EC of 0.4 (0.2 ppm) or more, you don't need to add fertilizers for the first 7 to 10 days. If your water has a lower EC (or ppm), or if you are using RO or distilled water, then add only enough fertilizer to get to an EC of 0.8 (0.4 ppm), and stop.
Step 2: Adjust Seedling pH
After you mix your fertilizers and your EC (or ppm) level is where you want it to be, it's time to measure your pH level and add drops of pH UP (can also use baking soda) or pH DOWN (can also use vinegar) in order to adjust it.
The ideal pH for any stage of growth depends on the media you are using to grow in. Here are the different pH levels you should be aiming for:
- Soil/Organic - pH of 6.5 (up to 7.0)
- PRO-MIX HP- pH of 6.1 (up to 6.3)
- Coco Coir - pH of 5.8 (up to 5.9)
- DWC/Rockwool - pH of 5.5

Is My Cannabis Seed A Dud?
If your seed hasn't germinated after 5 days, very carefully dig the seed out with a toothpick to assess it:
- If the seed is still intact, plant it in again.
- If the seedling already has a radicle (tap root), and it's white, plant it again.
- If the radicle is brown, then the seed is dead.
Did you buy your seed from an online seed bank? If your seed died, reach out to them and ask if they have germination guarantee on their seeds. A lot of them do and will send you new free seeds.

How To Prevent Dead Weed Seedlings?
Damping-off is the most common seedling killer and it looks brutal: a healthy sprout suddenly pinches at the soil line and folds over. But prevention starts before you plant, and it's all about hygiene.
Prevention
To prevent damping off, you should sanitize trays and cups with a mild 3% hydrogen-peroxide rinse between runs, always use fresh media, and make sure there is a simple vent gap in your humidity dome plus a small fan across the tray to move the high-humidity air away. Keep the root zone warm (around 25 °C) and avoid cold floors, which slow metabolism and give pathogens a head start.
Early Signs & Solution
If you see early signs such as slight translucence at the soil line, or a weak lean, act fast. Increase airflow, vent the dome wider, and let the surface dry before the next watering. Remove any collapsed seedlings so mold doesn’t spread.
If the seedling ends up dying, throw it away and make sure to wash your container thoroughly or use a new container for the next one. Also take the time to clean up your dome or grow space with hydrogen peroxide 3% to kill off any leftover spores.

How To Store Marijuana Seeds Safely?
Good seed storage is simple: keep seeds dark, dry, and cool so metabolism stays low and mold never starts.
Container
For most home growers, a small airtight container with a desiccant pouch in the refrigerator (not the freezer) is the sweet spot. Label everything with strain, source, and date - future-you will thank you.
Temperature
Aim for temperature stability over perfection. 39ºF to 46ºF (4ºC to 8ºC) is a good range to stay at, but keep in mind that temperature swings and humidity spikes do more harm than choosing one temperature versus the other.
Handling
When you remove seeds from cold storage, let the closed container sit at room temperature for 2–3 hours before opening it. This prevents condensation from forming on cold seeds, which can kickstart microbes.

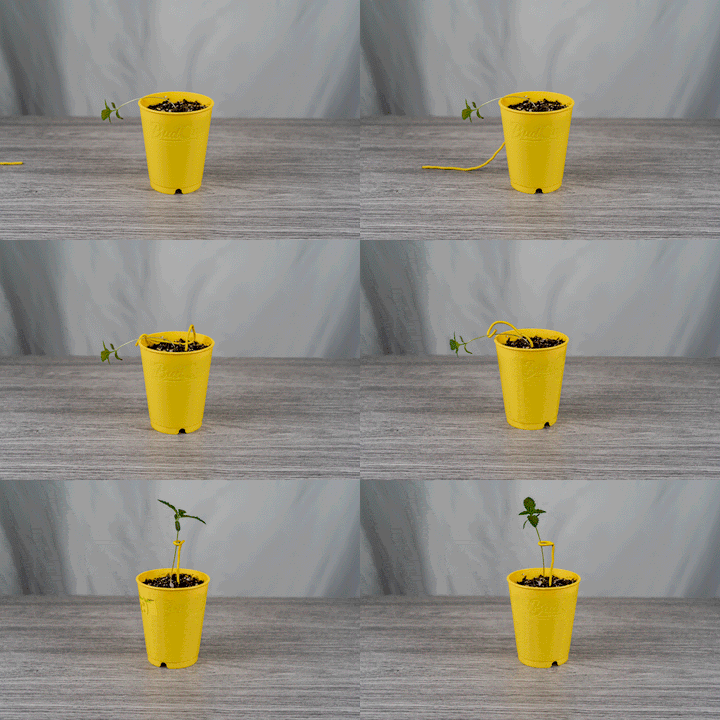
How To Fix Lanky Cannabis Seedlings?
If your seed doesn’t get enough light, it will grow tall and lanky, and eventually fall over, which is far from ideal.
When this happens, simply use a piece of BudHuggers to hold it upright - stick one end inside your media, halfway down the BudCups, and then twist the top to form a ring that can hold the main stem upright.
Lastly, increase the amount of light your seedlings are exposed to and they will start widening instead of growing tall.
If you don't have the BudHuggers yet, get your hands on them by clicking this link.
What If My Seed Shell Doesn't Fall?
If your seed shell stays stuck to your seedling as it comes out of the ground, don't worry - you just have yourself a hammer head. While you can simply wait and your plant will eventually push through it, you can definitely help it out by pulling it way. However, be warned: even with very delicate tweezers, there is still a chance you will hurt your cotyledons and your first true leaves.
To Remove A Hammer Head Seed:
- Choose thin tipped tweezers
- Hold the base of the seedling with your fingers (be careful)
- Hold the tweezers closed, then insert the tip in the opening of the seed shell
- Slowly let the tweezers open in the shell, such that it moves both sides open
- Go slow - if you notice damage to the leaves, stop
- Once the seed cap is loose, you can remove it with the tweezers

When To Transplant Weed Seedlings?
Some cannabis plants will grow fast and are ready for transplant after 3 weeks, but it can take up to 6 weeks on a slow-growing one.
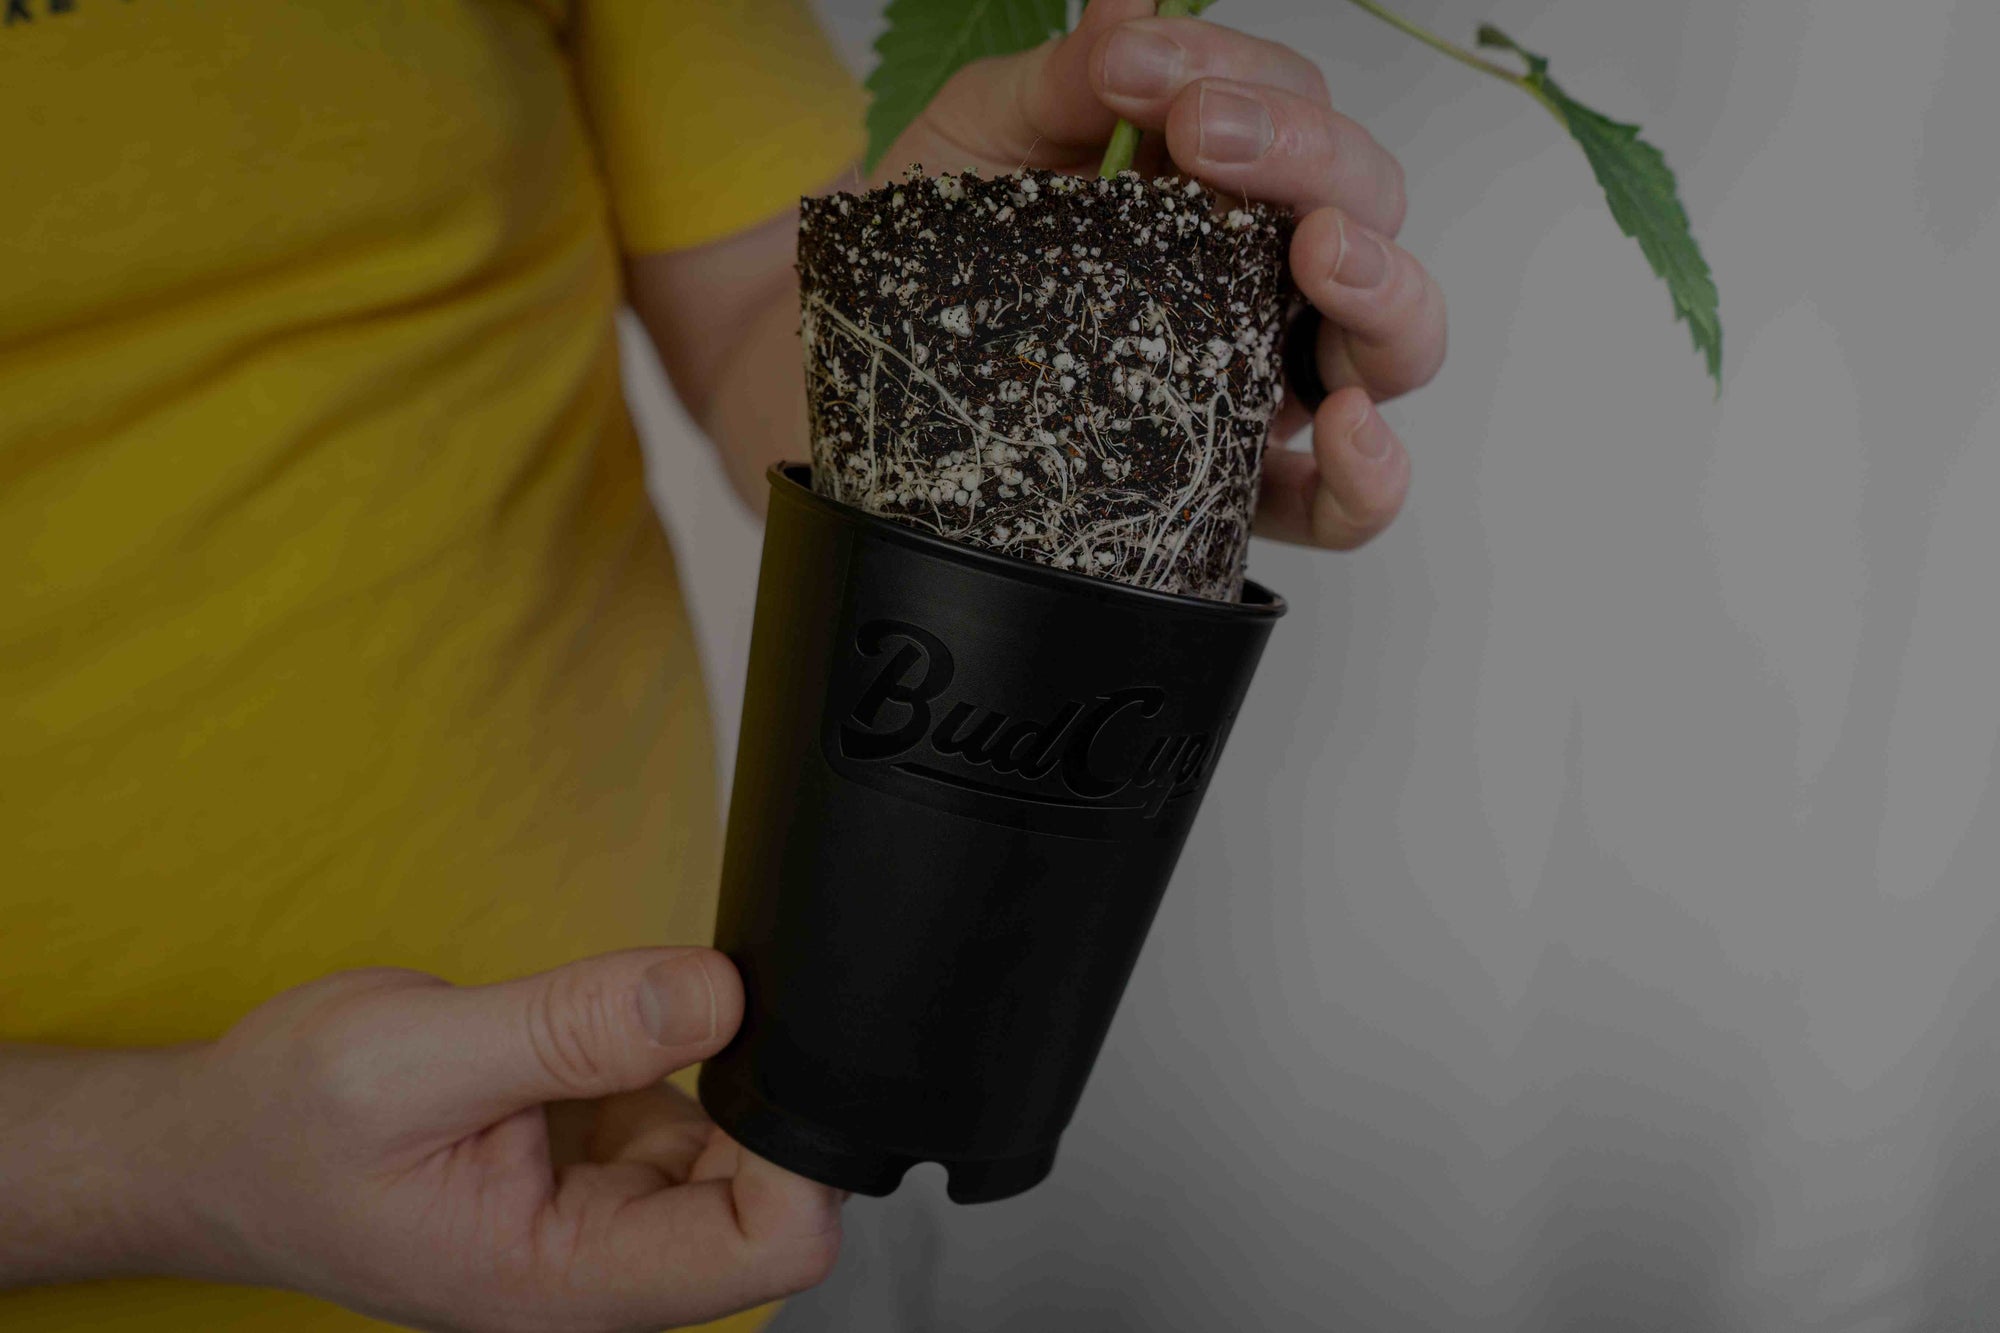
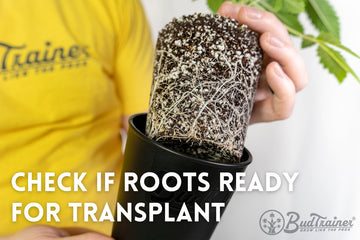
The best way to tell if your plant is ready for transplanting is checking your root ball for roots.
- If they are shooting out in all directions at the top, they are ready to transplant.
- If they are hardly showing on the sides, they still need some time.
- If they are already circling around, it's past time - transplant right away.
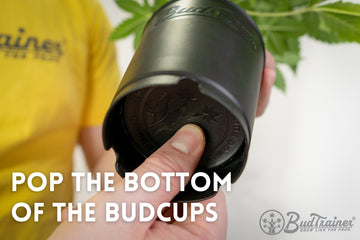
To peek at your roots, you will need to lift the seedling off your starting container. For the BudCups, this is easy - all you have to do is pop the bottom and have a look.
However, if you are using nursery pots or plastic cups, you will need to turn the plant upside down and let it fall on your hand. Do NOT pull the seedling by the stem as you can damage the base roots, or worse, rip them.
The next lesson in this series, "How to Transplant Cannabis", teaches you how to transplant your seedlings for the maximum root uptake.
Why Not Plant in the Final Pot?
The reason why we don’t plant our cannabis seeds directly into their final containers is because they end up developing weaker root structures than if we transplant them. Here is why.
When your seeds start in the BudCups, the tap root (the main root that comes out of the seedling) reaches their edge within a couple of days, which forces more roots to be produced from the center of the rootball. This allows for multiple root tips to form, so that when the young plant is transplanted into the next pot, those root tips are ready to shoot out and grow in every direction.
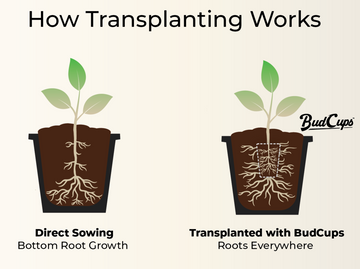
Conversely, if you were to plant your seed in the final container right away, the tap root would grow all the way to the bottom, and root tips would only form around the bottom because that is where the water stays after each watering session.
Should I Use The Paper Towel Method?
The paper towel method is a technique used by some cannabis growers to germinate seeds before planting them in soil. The process involves placing seeds between damp paper towels until they sprout in 1 or 2 days, after which they are transplanted to soil.

While the paper towel method can work for some, it is risky for several reasons. For one, if the germinated seedling is left in the paper towel for too long, the root can become tangled and potentially damaged during transplanting. Not to mention, it will not grow downward as it should, and will take some time to find its way.
Additionally, the paper towel method can expose the seed to contamination or infection, which can lead to poor germination rates or stunted growth. Planting directly in soil reduces the risk of infection and provides a more stable environment.
Overall, while the paper towel method can work, we find it is a waste of time. Planting directly in soil can be a simpler and more reliable method for germinating cannabis seeds, and can help them sprout healthier and stronger.
Checklist: How To Plant Marijuana
- Prepare cups or starting container
- Fill with desired media to the top rim
- Pre-moisten to correct pH and EC
- Make a ¼″ (6mm) deep hole & plant seed point-down
- Cover your seed with a dome until germination
Post-Planting Steps
- Set light to 100 PPFD on 18h ON/6h OFF schedule
- Hold roots at 75-79°F (24-26°C) and add gentle airflow
- Set humidity of RH 70% to 80% inside the dome or cup
- Add mild airflow after 1 week form germination
- Transplant once roots are sprouting out
Learn to Grow Big Buds
And be the first to hear about new articles, product releases, and special events.
About the Author
Henrique, the CEO of BudTrainer, is a mechanical engineer with a commercial cannabis production post-grad, and is also a former commercial cannabis consultant.
H takes plant science principles and breaks them down into simple steps for home growers to achieve the same results as the pros and grow the highest-quality cannabis.


