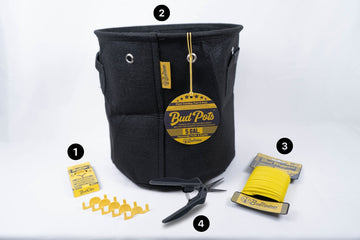
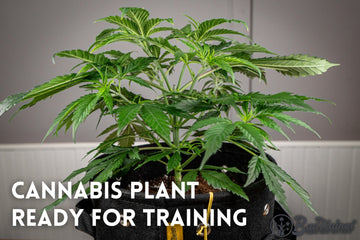
The BudTrainer Method™ Lesson #4
When & How to Train Hemp Plants
(works with AUTOFLOWERS)
Written by cannabis production expert Henrique Dias - Updated on Oct 8, 2024
DISCLAIMER: Everything taught and sold by BudTrainer® is to be used strictly for legal purposes. We condemn the production of illegal substances and it is your duty to ensure that you are complying with the law. The words "hemp", "cannabis", "weed", and "marijuana" are used interchangeably to refer to the same plant (legal hemp with less than 0.3% THC) for the purposes of this lesson.
The Easiest Way To Increase Your Yields: Plant Training
Did you know that 95% of commercial cannabis producers provide some form of training to their plants? They wouldn’t be doing it if it wasn’t increasing their yields.
We know it all too well because we’ve made the mistake of NOT training our plants, until we took to plant science and commercial cannabis production to create a training method that works on both photoperiods and autoflowers, and that increases your yields at home no matter what.
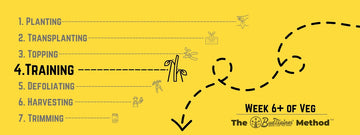
3 Stages of Cannabis Plant Training
The BudTrainer Method™ has three stages of training.
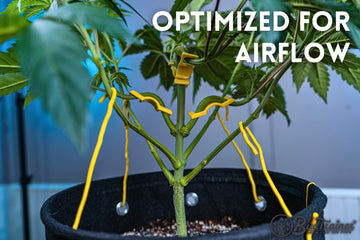
The first two stages are meant to help you manipulate your plant to maximize its light exposure and airflow, thus increasing photosynthesis.
The last stage, on the other hand, is meant to help you provide the necessary support for your buds so they can grow into large and juicy colas.
Stage 1. Main Stalk Setup
When: 1 to 2 weeks after topping
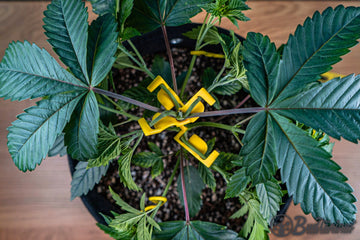
Stage 1 is all about optimizing for bud size. It’s meant to help you create a strong branch structure that allows your plant to grow bigger, denser buds. It is important not to wait too long before performing Stage 1 of training, otherwise your branches will grow too large and woody, and will be prone to breaking.
Stage 2. Branch Management
When: 1 to 2 weeks after stage 1 (can be repeated multiple times)
Stage 2 of marijiuana training, Branch Management is all about optimizing for bud consistency. It is meant to help you fill your entire grow space with buds of the same size. It can be done 1 to 2 weeks after Stage 1, and can be repeated a few times.
Stage 3. Bud Support
When: 3 weeks after flowering
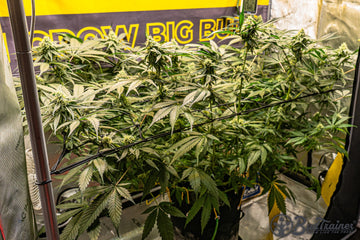
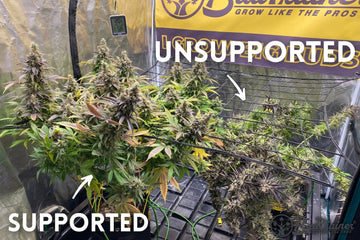
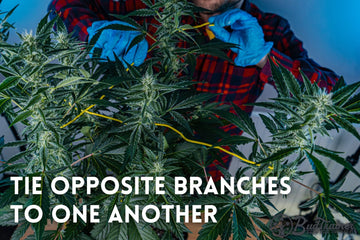
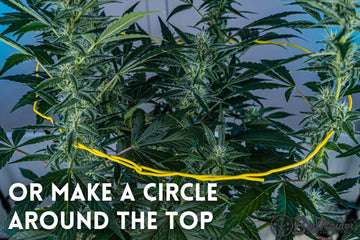
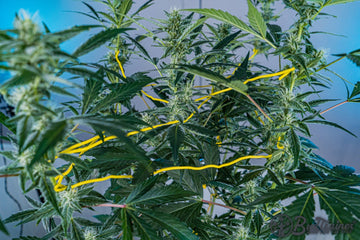
Stage 3 of cannabis plant training, Bud Support, is meant to help your plant withstand the weight of those big, juicy buds you are about to grow. If you don’t support your buds during the flowering stage, your plant will get floppy and fall over to the sides.
BudTip: The Branch Squeeze
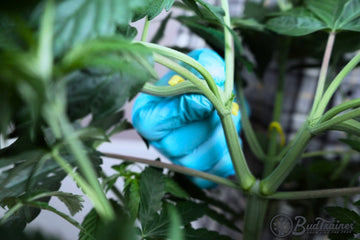
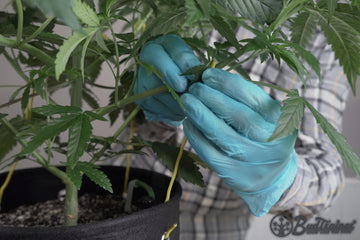
However, if you feel like your branch is going to break, STOP, and do a “branch squeeze”: gently squeeze your branch with your thumb and index finger, where the curve of the branch will be sharpest. By squeezing these fibers, you are preventing your branches from breaking when you bend them. And don’t worry if you squeeze your branch flat: they will form a knuckle and get stronger later on.
Please note: this plant didn’t need the branch squeeze, but it was done to help you better understand this lesson. When in doubt, a squeeze is always better than a break.
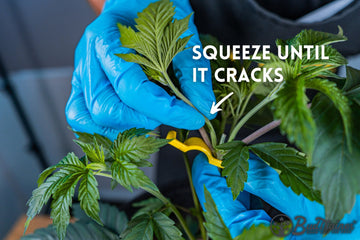
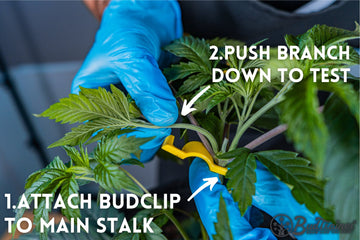
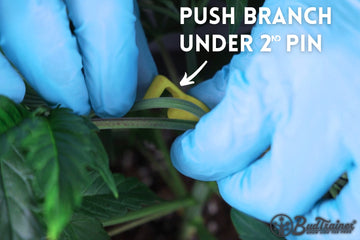
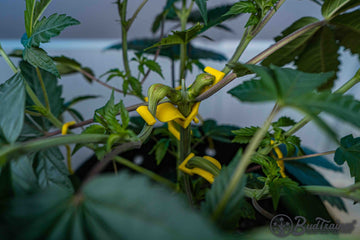
Once the branch is soft from the branch squeeze, you may train it under the 2nd pin of the BudClips.
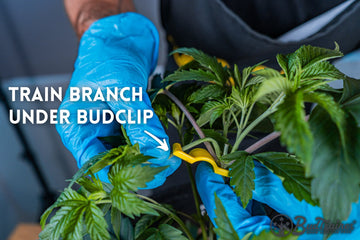
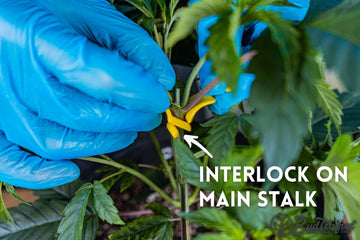
Once you are finished with the first BudClip, you can do the exact same thing to the other branch. This time, in order to attach the BudClip to the main stalk, you will need to interlock it as shown below. Without this interlocking ability, the BudClips would bump into each other and you'd only be able to train one side.
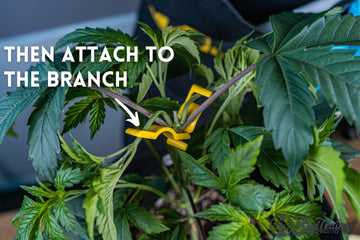
After one week, this is how those small top branches will be looking: wide and strong, ready to support multiple heavy buds at the top. The area where the squeeze happened one week prior will form a “knuckle” that is not only stronger but also thicker than the rest of the plant.
Step 2. Training 4th Node (2nd From Top)
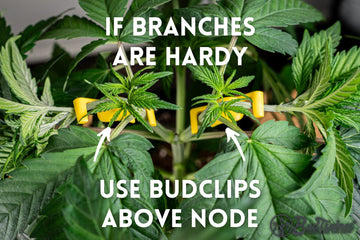
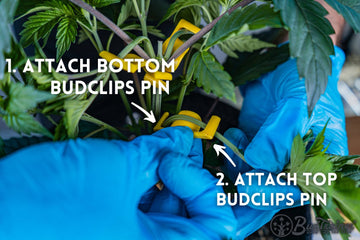
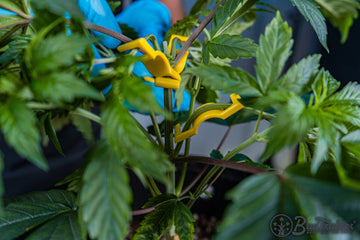
Once you are finished with the 5th (top) node, it’s time to train the 4th node the same way: either by interlocking your BudClips on the main stem, or, if the branches are too hard, which is usually the case with the second node, using the BudClips higher up on those branches, where they are bendy.
Please note: if you don’t have the BudClips, you can accomplish a very similar result by using only the BudHuggers and attaching them to the BudPots, as you will learn to do in Step 3.
To accomplish this, attach the pin closest to the main stalk, then attach the upper pin of the BudClips second, by bending the branch with your other hand.

BudTip: How to Fix a Broken Branch
Don’t sweat it! Breaking branches is a rite of passage in cannabis cultivation, and we STILL break branches to this day. In fact, that’s what happens when you are pushing the limits of how big your buds can be.
A broken branch, while not ideal, will not take that much away from yield. Cannabis plants have very fast metabolisms, and they will channel energy to the branches that are left instead - reconstructing your plant in a way that will still produce lots of buds!
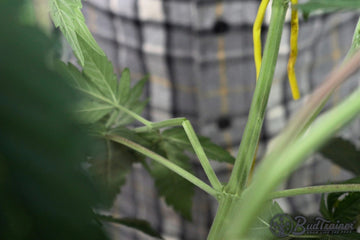
To fix a broken branch simply use some tape, like the BudTape™, around the broken area, connecting both ends of the broken branch, and make sure that both sides of the broken tissue are touching.
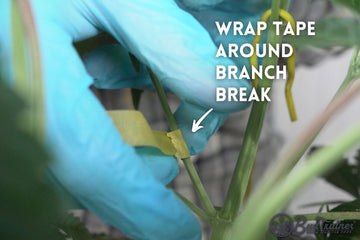
If your branch is heavy, make more rounds of tape until it provides enough structure, but not too much to squeeze the branch.
NOTE: If your banch came off completely and is now in 2 pieces, unfortunately, you cannot fix it anymore. Just make sure you leave the remaining branch exposed to as much light as possible.
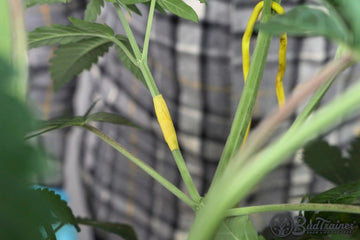
1 week later, your plant will be fully healed and you can remove the tape to allow your branch to continue growing.
Step 3. Training Remaining Nodes
Now that your top 2 nodes are trained, it’s time to take care of your bottom 2 nodes. However, there are 2 scenarios that you can run into here. The 1st is where your bottom branches are long and have made it to the top of the canopy. The 2nd is when your bottom branches are short, staying low and in the middle of the canopy.
As in the plant below, you can see that the bottom branches are long, and their tips are facing outward, almost at a 45 degree angle. This is usually how bottom branches grow - tall and off to the sides. If this is the case with your plant, it means you are doing well! Now it’s time to train them.
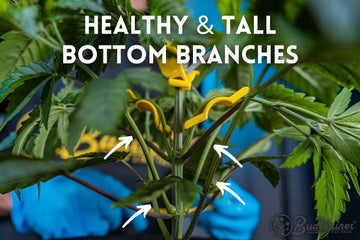
First, cut a 4" to 6" piece of BudHuggers and attach the first end to the grommet closest to the branch, securing it in place by squeezing it around the BudPots.
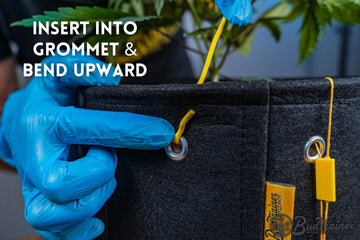
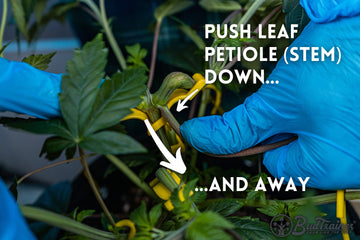
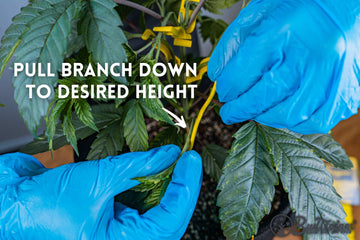
Pull the branch down to your desired height and measure where you want to bend your BudHuggers. If there are large leaves on the way, you can also pull the branch sideways and attach it to an adjacent grommet. This will allow you to train your branch down and to the side at the same time.
Please note: make sure to arrange the bottom branches at a similar height to the top branches, otherwise they will get less light exposure and become dwarfed.
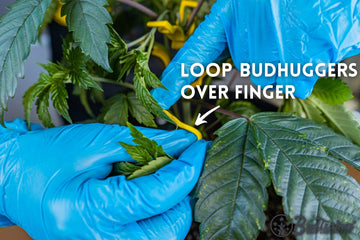
Loop the BudHuggers around your finger to create a large loop for the branch.
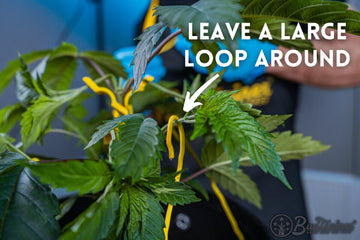
Release the branch in place and adjust as you see fit. Make sure to create a loop at least twice as large as the branch, otherwise it can get strangled. Repeat this process with the remaining branches, until all 8 branches are trained on the BudPots’ grommets.
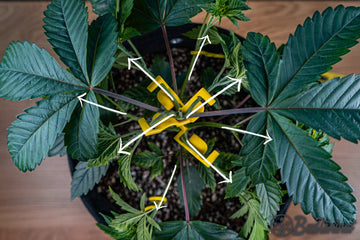
When arranging your branches, organize them as symmetrically as possible - pulling opposite branches from the same node at 180 degrees from one-another, and leaving space between them.
Please note: if you don’t have the BudHuggers and the BudPots, you can accomplish the same technique by using the BudClips Just make sure that they are being used toward the tip of the branch, on the soft part and not the woody part.
Step 2. Topping Again (Not For Autos)
Please note: skip to Step 3 if you are growing autoflowers, as it is not recommended to top them twice. At this stage, they will already be well into the flowering stage.
Topping shouldn’t be anything new to you at this point, as you already learned how to top your cannabis plants on Lesson #3: How to Top Cannabis.
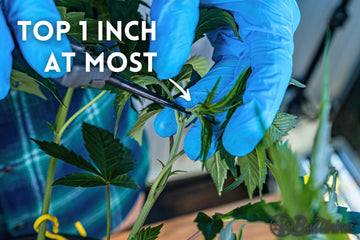
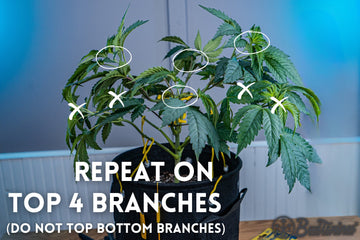
Well, this is the part where you get to top our cannabis plants for the 2nd time. When topping for the second time it is important to only top the 4 top branches, and not the 4 bottom branches, as they already have to work harder to make their way to the top of the canopy. By topping only the top nodes, the lower ones can “catch up”. To top again, simply cut the top 1 inch from each one of the 4 top branches, leaving behind 2 or 3 nodes on each (4 to 6 new growth sites each).
Can I Top More Than Twice?
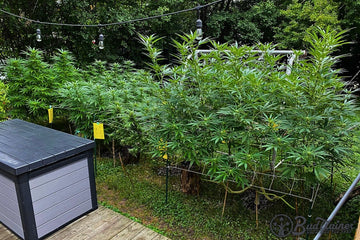
Yes you can! While not recommended when growing indoors (unless you have more than 15 sq.ft per plant), if you are growing outdoors you can top your plant for a 3rd or 4th time after 1 to 2 weeks from the previous topping. This will once again “multiply” your plant. The plants below, for example, were topped a total of 4 times using the mainline training method.

BudTip: Always Prune Dwarfed Branches
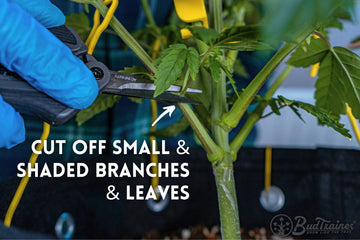
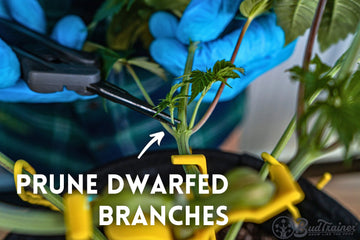
Before topping your plant for a second or third time, remove any growth sites where the node is either shaded, or has a large and a small growth site. By removing the small growth site from the pair (as pointed by the white arrow below) you help your plant focus its energy on the larger growth site, instead of wasting it on a small branch that will never grow past the top of the canopy.
Step 3. Training Branches
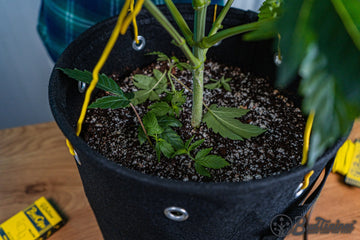
Once your plant is “clean” of old and shaded leaves, and small branches, you can start doing two things: re-training your old branches from the week or two before, and training the new branches that already grew off of them. You will be using both the BudClips, and the BudHuggers and BudPots combo.
Top 2 Nodes
Since you used the BudClips on your top 2 nodes during Stage 1 of training, now it is time to reapply the BudClips higher up on the branch in order to continue training it sideways. It is very important to remove your BudClips once the branches become thicker, otherwise they will start getting squeezed if you don’t.
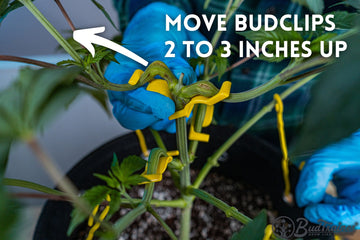
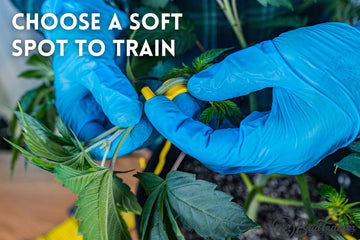
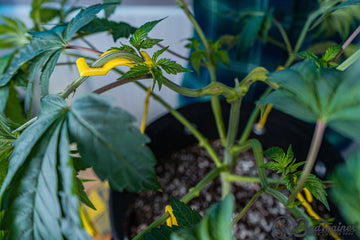
Please note: if you are using the BudHuggers to tie the top branches to the BudPots, simply reattach them further up on each branch in order to continue training it sideways.
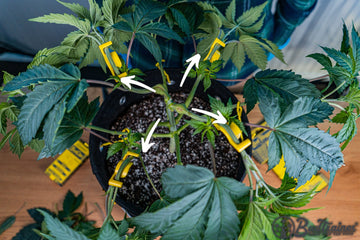
After you finish the top 2 branches, you can repeat the process with the 2 branches just below it. In total, you will have moved 4 BudClips higher up on the branch, as shown in the image below.
Extra Branches
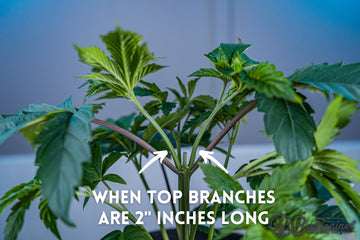
At this stage, your plant may already have big growth sites coming out of the main branches, which are already long enough (2 to 3 inches) to get trained with the BudClips. If this is the case, simply attach your BudClips to these new branches in such a way that provides your plant with maximum light exposure and air circulation.
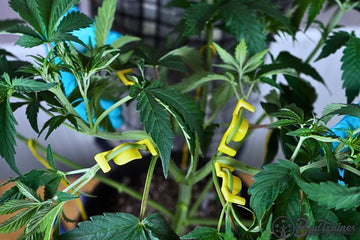
Bottom 2 Nodes
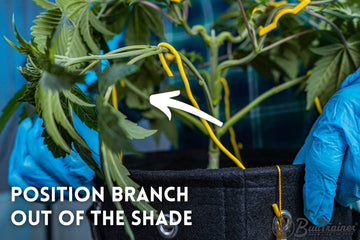
During Stage 1 of training, you used the BudHuggers to train your bottom 2 nodes. Now it is time to remove the BudHuggers from where they were, and move them higher up on the branch, pulling it down and to the sides even further. This will help you gain a few extra square inches of canopy area.
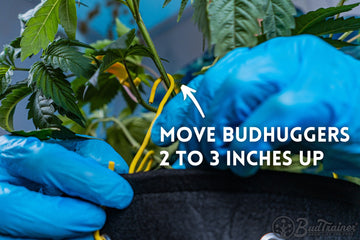
Please note: if the bottom branches are already below the canopy, do not pull them down. Instead, you may train the bottom branches from left to right, in such a way that they will be under direct light and away from the shade.
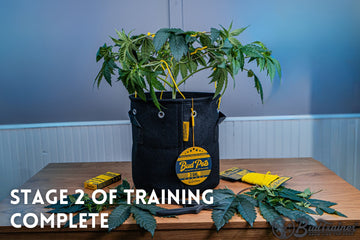
You Are Off To Growing Massive Branches
Now that you trained your plant during both stages 1 and 2, it will be ready for the flowering stage. All of your branches will continue to grow and thicken up from this point on, making way for the largest buds you ever grew. After Stage 2 is complete, wait 3 days in order for your plant to fully recover, and then switch it to the flowering stage with a 12h ON/ 12h OFF light cycle. You can start Stage 3 of training as soon as the 3rd week of flowering is complete.
Marijuana Plant Training FAQs
Q. What is the difference between training indoors vs outdoors?
Veg Training
Since outdoor plants flower automatically after late July/August, you can train your plants as much as you would like until that point on Stage 2. Indoors, however, it is not recommended to veg your plants for longer than 7 or 8 weeks, which means you only get to train your plants once on Stage 2. Growing outdoors also requires constant defoliation, which is the topic of the next Lesson #5: How to Defoliate Cannabis, while indoors only requires a few leaves to be removed.
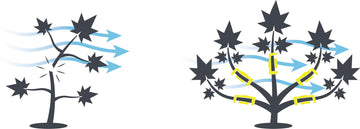
Airflow
As we have seen before, airflow is essential for plants to absorb CO2. For this reason, it is equally important to train indoor and outdoor plants to maximize airflow around the leaves. The main difference, however, is that outdoors plants have the extra pressure from pests while indoor plants generally don’t. This is why we highly recommend defoliating outdoor plants at least once a month to clear out all old leaves that are turning yellow, not catching any more light, or that are blocking airflow to the middle of the plant. As long as you don’t create pockets of clustered leaves, you should be safe from pests.

Support
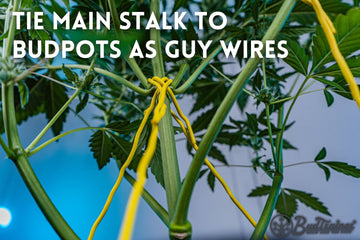
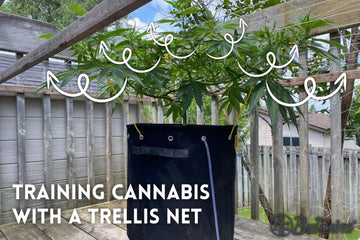
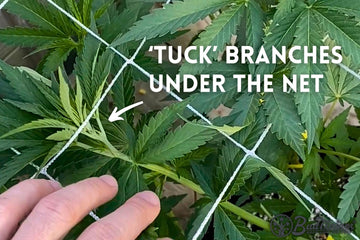
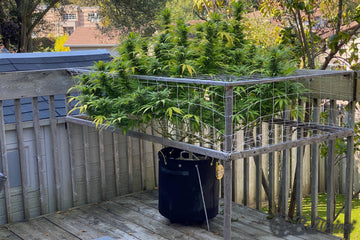
When growing cannabis indoors, we never have to worry about strong winds breaking our stems. But outdoor growing is a different story. We personally have friends who lost entire plants because of strong winds that broke them at the stem. This is not an uncommon story. Many growers fail to train their outdoors plants and instead let them grow naturally into the Christmas tree shape. The problem with this is that, after flowering, the untrained plant gets very heavy at the top, and any strong wind can break its main stem in half. This is why it is crucial to give your outdoor plants the side support they need in order to survive strong winds. You can do this with tomato wires, garden stakes, garden ties, trellis nets, and ropes.
Q. What is the difference between training indicas and sativas?
Indicas
- Easier to train
- Requires more defoliation and pruning
- Only needs to be topped once
- Needs to be trained less frequently
- Lower profile plants
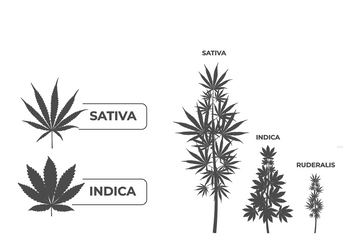
Due to their genetic makeup, cannabis indicas have a sturdy growth structure, with thick fingered fan leaves and short spaces between each set of leaves (called internodal spacing). These features make indicas great for beginners who want to practice all training techniques, including topping, low-stress training, pruning, & defoliation. Since indicas are short and stocky, they are super easy to train when compared to their tall and lanky sisters: the sativas.
Sativas
- More difficult to train
- Requires less defoliation and pruning
- Needs to be topped multiple times
- Needs to be trained more frequently
- Higher profile plants
Sativa cannabis strains have a tall and skinny structure, with longer internodal spacing (space between each node). This makes it extra important to constantly low-stress train and top them so that they stay low to the ground. We recommend topping sativas once every 2 weeks until it is time to switch them to flower. This will ensure your plants don't grow too tall too quickly and end up reaching your lights (indoors) or becoming prone to breaking under strong winds (outdoors).
Learn to Grow Big Buds
And be the first to hear about new articles, product releases, and special events.
About The Author
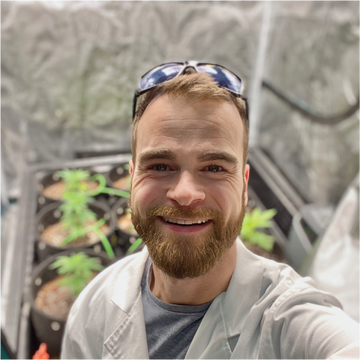
Henrique, the CEO of BudTrainer®, is a mechanical engineer with a commercial cannabis production post-grad, and is also a former commercial cannabis consultant.
H takes plant science principles and breaks them down into simple steps for home growers to achieve the same results as the pros and grow the highest-quality cannabis.

