The BudTrainer Method™ Lesson #4.1
When & How to LST Low-Stress Train Cannabis
(works with AUTOFLOWERS)
Written by cannabis production expert Henrique Dias - Updated on Oct 8,2024
DISCLAIMER: Everything taught and sold by BudTrainer® is to be used strictly for legal purposes. We condemn the production of illegal substances and it is your duty to ensure that you are complying with the law. The words "hemp", "cannabis", "weed", and "marijuana" are used interchangeably to refer to the same plant (legal hemp with less than 0.3% THC) for the purposes of this lesson.
Low-Stress Training: The Oldest Trick to Bigger Yields
Did you know that LST Low Stress Training is the most common way to train cannabis plants in the world? Over 95% of commercial cannabis growers low-stress train their plants in one form or another, which is a sign you should too.
Low-stress training, as the name suggests, is any technique used to gently manipulate your plants such that they will take on a different shape: one that is optimized for catching more light and airflow, and thus increasing the rate of growth of your plant. In this article, however, we will teach you how to low-stress train a cannabis plant from seedling to flower.
3 Stages of Cannabis LST Low-Stress Training
The classic LST (Low-Stress Training) method has three stages of training.
The first two stages focus on shaping your plant to optimize light exposure and airflow, which boosts photosynthesis. The final stage is designed to give your buds the support they need to grow into big, dense colas.
Stage 1. Main Stalk Setup
When: 3 to 4 weeks after germination
Stage 1 is all about optimizing your stalk for light exposure. It’s also going to help you create a strong stalk structure that allows your plant to grow bigger, denser buds later on. It is important not to wait too long before performing Stage 1, or your main stalk will grow too large and woody, and will be prone to breaking.
Stage 2. Branch Management
When: 2 to 3 weeks after stage 1 (can be repeated multiple times)
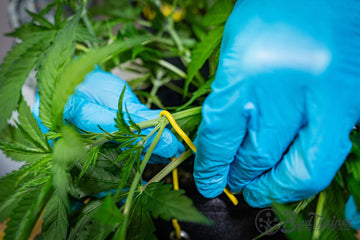
Stage 2 of cannabis training, Branch Management, focuses on achieving consistent bud size throughout your grow space. This step helps ensure that all your buds develop evenly. You can start this stage 2 to 3 weeks after completing Stage 1, and it can be repeated a few times depending on the length of your vegetative phase. However, for autoflowers, you only get one opportunity to perform this step.
Stage 3. Bud Support
When: 3 weeks after flowering
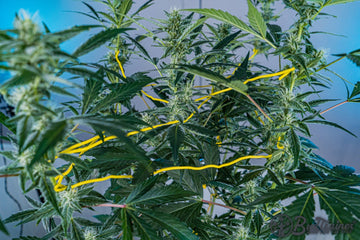
Stage 3 of cannabis training, Bud Support, helps your plant handle the weight of the large, dense buds it’s about to produce. Without proper support during the flowering stage, your plant can become floppy and collapse under the weight of the buds.

BudTip: Plant/Transplant On The Edge
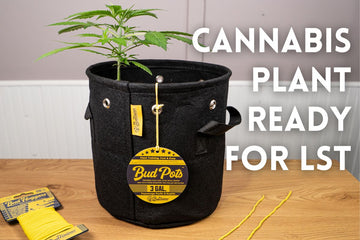
To get the most out of your LST job, we recommend that you don’t transplant/plant your seedling in the center of your pot. Instead, plant or transplant it 1.5" inches away from the edge of your BudPots, right next to one of the grommets. This will allow you to grow a larger and longer main stalk as your plant grow across the fabric pot, and you will use your pot area much more effectively.
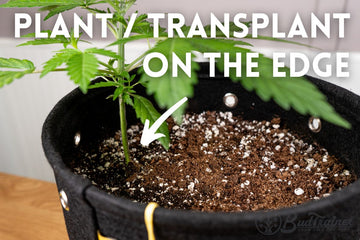
How to LST Weed Plants | Stage 1
When to Start
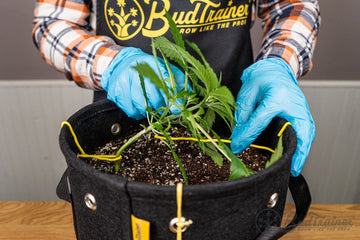
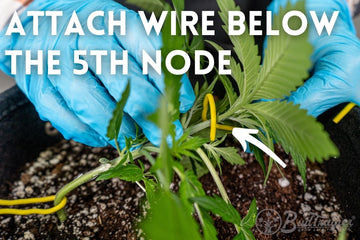
The first stage of marijuana plant training is meant to transform your main stalk into a thick sideways trunk, thus increasing your plant’s canopy area and light exposure for the lower branches. The best time to do this is when the 5th node appears.
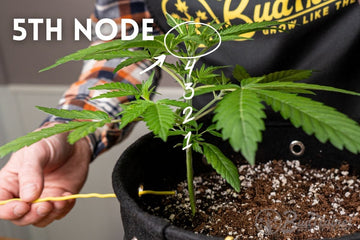
Step 1. Training the Main Stalk
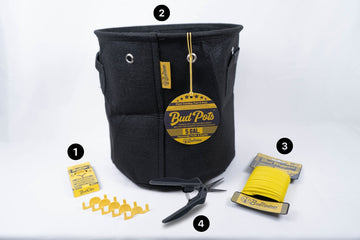
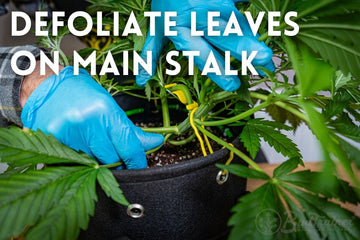
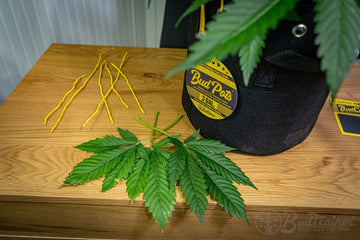
With your BudHuggers, attach one end of the BudHuggers to the closest hole to your plant on the BudPots. Attach the other end to the base of your seedling, about 1" to 1.5" from the soil level. This will help ensure your main stalk has a strong base support, preventing it from getting bent on an angle and into the ground.
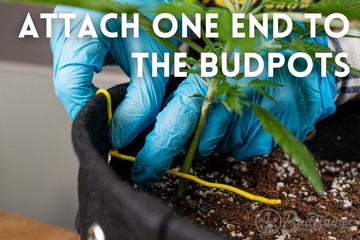
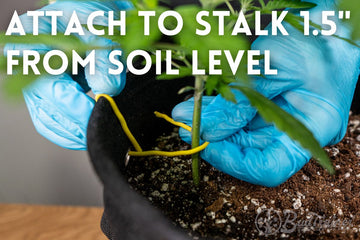
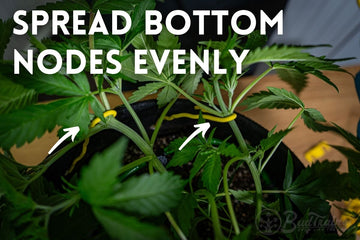
After the base is secure, bend your seedling at roughly 90 degrees and secure it in place with another piece of BudHuggers, this time tied to the opposite hole in your BudPots. Together, the first and second rubber wires will help keep your seedling in the horizontal position.
If you can't get your garden ties to reach the other side of your fabric pot, you can insert one end of the garden tie in the soil, as an anchor, and use the other end to bring the top of the seedling down.
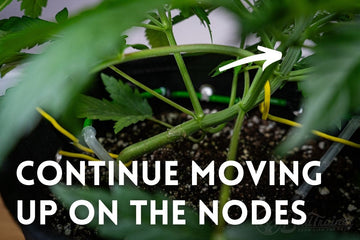
Continue Training The Main Stalk Every Week
After training your main stalk to the side, it will keep trying to grow upwards after a few days. In order to continue growing it sideways, move your BudHuggers up to the next node when the plant is tall enough. You can repeat this until your main stalk reaches the opposite of your BudPots.
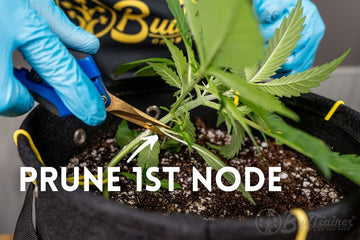
Step 2. Pruning First Node
After training the main stalk to the side, trim off both leaves and growth sites at the 1st node. This node doesn’t develop into strong branches, and removing it helps direct more energy to the remaining top nodes.

BudTip: How to Fix a Broken Branch
Broke a branch? No worries! Breaking branches is a common part of growing cannabis, and we still break branches ourselves. It’s just part of pushing your plants to grow bigger buds.
While a broken branch isn’t ideal, it won’t have a huge impact on your yield. Cannabis plants are super resilient and will redirect energy to the remaining branches, reshaping themselves to keep producing plenty of buds.
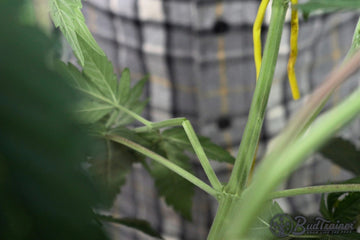
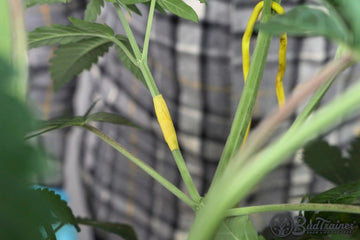
To fix a broken branch, just wrap some tape, like the BudTape™, around the break, making sure both sides of the tissue are touching. If the branch is heavy, wrap more tape for support, but don’t overdo it.
NOTE: If your banch came off completely and is now in 2 pieces, unfortunately, you cannot fix it anymore. Just make sure you leave the remaining branch exposed to as much light as possible.
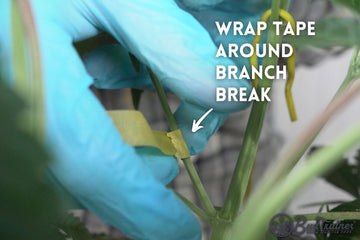
After about a week, your plant should be healed, and you can take off the BudTape™ so the branch can keep growing strong.
How to LST Weed Plants | Stage 3
Please note: the third stage of training is to be performed right after the mid-flower defoliation (AKA “lollipopping”) between day 21 and 25 of flower, where you will remove all lower leaves and shaded branches. To learn how to defoliate and prune your plants to increase airflow and light penetration, head on over to Lesson #5: How to Defoliate Cannabis and then come back here.
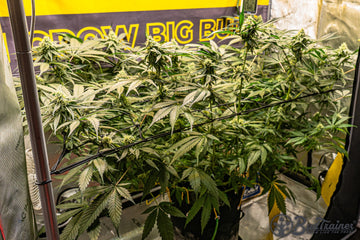
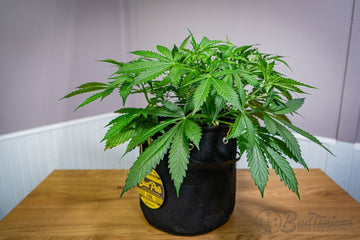
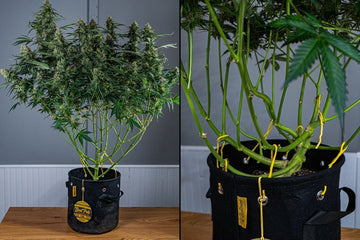
The 3rd stage of plant training is all about supporting your buds so they don’t fall over when they get heavy, like the plant on the right, below. This stage kicks off right after the third week of flowering (around 21 to 25 days into the flowering cycle). At this point, your plant stops growing taller and starts bulking up, which is when it becomes top-heavy.
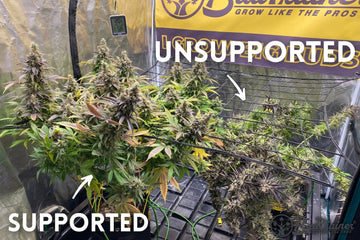
To support your buds, you have two options: using garden ties like the BudHuggers or a trellis net. The BudHuggers are versatile since you can use them anywhere, and they allow you to move your plants around as needed. A trellis net, on the other hand, offers stronger support for your buds but requires a fixed structure, like the corner poles of an indoor tent or a wood/PVC frame. This means once the net is in place, you won’t be able to move your plants until it’s time to harvest.
1. Garden Ties (BudHuggers)
The quickest and simplest way to support your buds is by tying opposite branches to each other, so they can provide mutual support. To do this, pick branches that are directly across from each other (180 degrees apart) and tie them together. Don’t pull them towards each other—just tie them as they are to keep the support balanced.

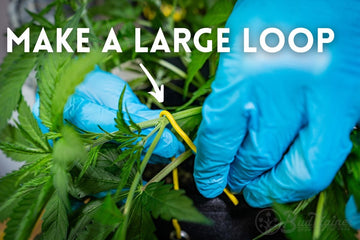
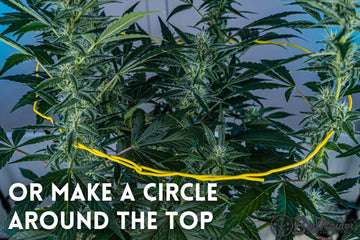
You can also tie all the branches together in a large loop, similar to a tomato cage. To do this, cut a long piece of BudHuggers and wrap it around your plant, creating a big hoop. Then, tie the loop to 3 or 4 branches to keep it in place so it doesn’t slide down. This will help your buds thicken up without dragging the branches down.
2. Trellis Netting
Since this lesson isn’t about building a trellis net, we’ll assume you’ve already set one up in your grow tent or outdoor space. We recommend using trellis netting with 3” holes, which is ideal for supporting about one large cola per hole.
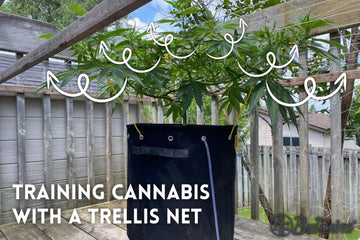
Unlike garden ties, which you start using around week 3 of flowering, you can begin using a trellis net at the start of the flowering cycle. To support your buds with the net, you’ll need to low-stress train each branch by “tucking” them under the netting. Wait until a branch is 3 to 4 inches above the net, then tuck it under the next line to help widen your plant’s canopy.
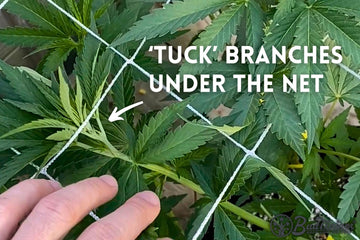
Once the plant stops stretching at the end of the third week of flowering, you can stop tucking and let the branches grow freely. By then, your plant will have reached its full width, and the net will shift from holding branches down to supporting the weight of those heavy, juicy colas that are on the way. Essentially, the trellis helps keep branches down early on, and later, it keeps your buds supported.
You Are Off To Growing Massive Buds
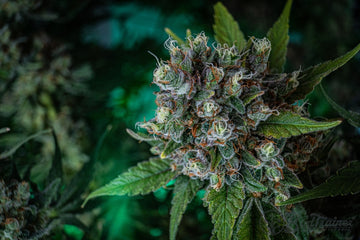
This stage of your plant’s growth is exciting because it means you’ve done most of the hard work, and now you get to enjoy the results. As your marijuana plants mature toward the end of the flowering cycle, you’ll start to see those prized trichomes forming and smell the pleasant aromas from the terpenes. From here, it’s all about maintaining your watering and fertilizing routine, while you sit back and watch your buds thrive.
Learn to Grow Big Buds
And be the first to hear about new articles, product releases, and special events.
About The Author
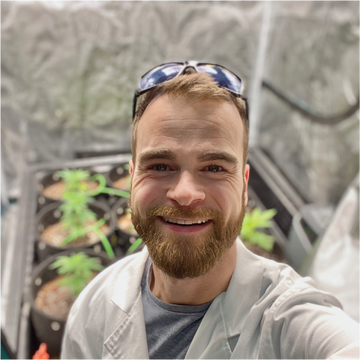
Henrique, the CEO of BudTrainer®, is a mechanical engineer with a commercial cannabis production post-grad, and is also a former commercial cannabis consultant.
H takes plant science principles and breaks them down into simple steps for home growers to achieve the same results as the pros and grow the highest-quality cannabis.

